Configuring a Camera#
Configuring a Camera#
To configure a camera:
- Put an object in the camera's field of view.
- Make sure that the object is properly illuminated. Use continuous illumination for this initial setup. If you want to use strobe light in your application, it's better to try this after the initial setup. If you need assistance in determining the optimum illumination for your application, contact Basler technical support.
- Open the lens aperture of the camera "halfway" by choosing an intermediate f-number.
- Click the camera's name in the device tree of the pylon Viewer to select the camera.
Notice that your camera's name now appears at the top of the Features pane. If you select a feature in the Features pane, you can adjust its settings. - (GigE cameras only:) In the Features pane, click the Transport Layer Control category and set the Packet Size parameter to 1500.
-
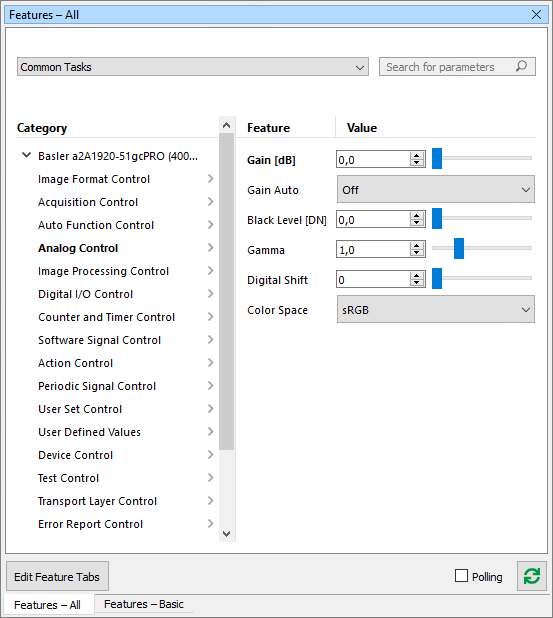
Change the Gain and Black Level settings to their lowest allowed values:
- In the Features pane, click the Analog Control category.
A list of the parameters in this category will appear on the right. - Change the gain and black level values by using the slider or the up/down arrows next to the value box, or by typing a new value into the box.

- In the Features pane, click the Analog Control category.
-
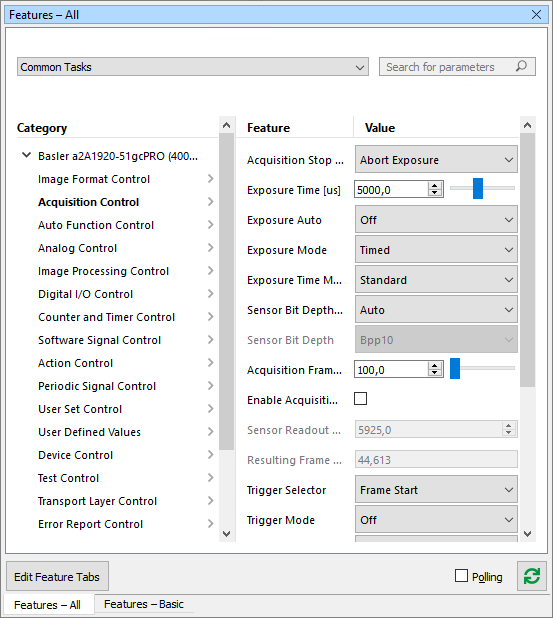
Change the Exposure Time setting to its lowest allowed value:
- In the Features pane, click the Acquisition Control category.
A list of the parameters in this category will appear on the right. - Use the slider to set the exposure time to its lowest allowed value.

- In the Features pane, click the Acquisition Control category.
- Click the Continuous Shot button on the toolbar, press F7, or click Camera in the menu bar and select Continuous Shot.
The camera starts acquiring images continuously. The acquired images are displayed in the image window of the camera.
Adjusting Image Brightness#
With the current camera settings, the images you are seeing may be very dark or perhaps even black.
To adjust the image brightness:
- Increase the Exposure Time setting enough, so that the brightness of your image is almost at the desired level. (The viewer is capturing and displaying images continuously, so you should see the effect of any setting change almost immediately.)
- If required, increase the Gain setting slightly to improve the contrast.
- If no image is visible, if it is not stable, or if the image displays artifacts, try one or both of the following:
- Go to the Acquisition Control category and decrease the frame rate.
- Go to the Transport Layer Control category and decrease the packet size. (If you are using a GigE camera, the network adapter to which your camera is connected, may not be able to handle the packet size used by the camera.)
If you were able to solve the problem, go back to step 2. Otherwise, contact Basler technical support.
- Adjust the focus ring on the lens so that the image is properly focused.
- Adjust the lens aperture to fine-tune the overall image brightness. Also take note of the depth of focus in the acquired images. Adjusting the aperture affects the depth of focus.
- Make small adjustments to the black level to ensure that detail is still visible in the darkest parts of the acquired images.
- Stop image acquisition by clicking the Stop button on the toolbar, by pressing F8 or by clicking Camera in the menu bar and selecting Stop.
- Save the image in the display window by clicking the Save button on the toolbar or by clicking Camera in the menu bar and selecting Save.
Now that you have configured the basic settings of your camera to acquire an image, you can optimize the image quality.