Image Morphology vTool#
Image morphology filtering is a preprocessing step that uses common morphology operations to reduce image noise or to suppress or emphasize certain image structures.
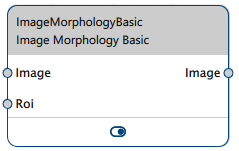
The Image Morphology vTool accepts an image via the Image input pin and outputs the filtered image via the Image output pin.
If you use the ROI Creator vTool to specify a region of interest before using a morphology operation, the Image Morphology vTool accepts the ROI data via its Roi input pin. In that case, the morphology operation is only performed on the region of interest, which results in faster processing.
The Image Morphology vTool is available in the Preprocessing Basic license. To buy a license, visit the Basler website.

Image Morphology vTool Versions#
Two versions of the Image Morphology vTool are available. The following table shows the differences between the versions. Click a version in the table heading to jump directly to the relevant section in this topic.
| Starter | Basic | |
|---|---|---|
| Is the Rank morphology operation available? | No | Yes |
| Valid data types for Roi input pin | RectangleF | RectangleF, RectangleF Array, Region, Region Array |
| Buy license | Included in the pylon Software Suite | Visit Basler website |
How It Works#
The Image Morphology vTool offers the following morphology operations:
- Dilation
- Erosion
- Closing
- Opening
- Median filtering
- Rank filtering (Basic version only)
Mask Shapes#
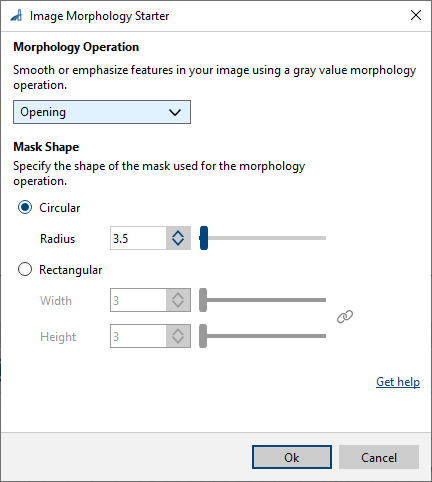
For all morphology operations, you can use a rectangular mask. In addition, you can use a circular mask for Dilation, Erosion, Closing, and Opening. Depending on the mask shape, you can specify width and height or radius. Every mask has a well-defined center. During the morphology operation, the mask is moved over the image line by line.
For rectangular masks, only odd width and height values are allowed.
If you open the settings dialog for the first time and select a rectangular mask, the Width and Height options are linked. This means that you can change both parameters at the same time and the resulting mask will be square. You can also specify width and height separately. To do this, click the chain icon to break the link between width and height.
- Options linked:
- Options unlinked:
For circular masks, you can specify the radius in 0.5 pixel increments. Radii with values like 1.5, 2.5, etc., produce masks that are symmetrical with respect to their centers. In case of integer radii (e.g., 1.0, 2.0, 3.0, etc.), the center of the mask is one next pixel to left and up from the center of gravity.
For median and rank filtering, only rectangular masks with odd width and height values are allowed.
Dilation and Erosion#
Dilation is the same as a maximum filter. It sets the output gray value, which is the center of the mask, to the highest gray value of all pixels of the input image covered by the mask. Thus, a Dilation dilates or expands bright structures in an image.
Erosion is the same as a minimum filter. It sets the output gray value, which is the center of the mask, to the lowest gray value of all pixels of the input image covered by the mask. Thus, an Erosion erodes or shrinks bright structures in an image.
Example: Assume you have a binary image, meaning all pixels can only take the state dark or bright, e.g., 0 and 200. Now, compare this to a region resulting from thresholding the bright pixels of an image, e.g., using the Auto Thresholding Basic vTool. In this case, image morphology produces the same result as region morphology. This means, the sequence of thresholding (bright pixels) and region morphology processing (i.e., Dilation, Erosion, Closing, and Opening) produces the same result as the sequence of image morphology filtering and thresholding.
Closing and Opening#
Opening and Closing work the same way as the corresponding region morphology operations:
- Closing is a Dilation followed by Erosion.
- Opening is an Erosion followed by Dilation.
The mask stays the same for both operations.
Closing can be used to remove small dark regions from an image. You could, for example, use a Closing operation to produce a background image of an image containing dark text on a bright background. In this use case, the mask size should be between 2 to 3 times bigger than the letters.
Conversely, the Opening operation can be used to remove small bright regions from an image.
Median Filtering#
The Median filter takes all pixels of the input image covered by the filter mask, sorts them in ascending order, and chooses the median gray value, i.e., the gray value at the center of the ordered list. This median value is then used in the output image.
The filter roughly preserves the overall image brightness and can be used as an alternative to the mean and binomial image smoothing filters.
It produces a so-called robust average as outliers (values deviating strongly, i.e., very bright or very dark pixels) don't impact the outcome. Because of this, the Median filter is better suited to suppress salt-and-pepper noise.
Rank Filtering (Basic Version Only)#
The Rank filter is a very general type of filter with which you can achieve the same result as the above-mentioned Erosion, Dilation, and Median filters.
All pixels of the input image covered by the filter mask are sorted in ascending order. The output gray value is the gray value at the position or rank in the list that has been defined by the user.
A Rank filter with a rank value of 0 is the same as a minimum filter (i.e., Erosion). A Rank filter with a rank value of 0.5 is the same as a Median filter. Lastly, a Rank filter with a rank value of 1.0 is the same as a maximum filter (i.e., Dilation).
Example: Assume you have an image with dark text on a gray background. Normally, you would use Erosion to remove the letters. However, there is also a bit of noise in the background, e.g., some tiny bright spots. Using Erosion would result in a strange-looking background dominated by the appearance of these bright spots. Instead, use the Rank filter with a rank value of something like 0.8. This way, the filter removes the dark letters and the bright spots at the same time.
Image Morphology Starter#
Configuring the vTool#
To configure the Image Morphology Starter vTool:

- In the Recipe Management pane in the vTool Settings area, click Open Settings or double-click the vTool.
The Image Morphology Starter dialog opens. - In the Morphology Operation area, select the desired operation.
- Select the desired mask shape: Circular or Rectangular.
- Depending on the mask shape specify the Radius or Width and Height of the filter mask.
You can view the result of the transformation in a pin data view.
Image Morphology Basic#
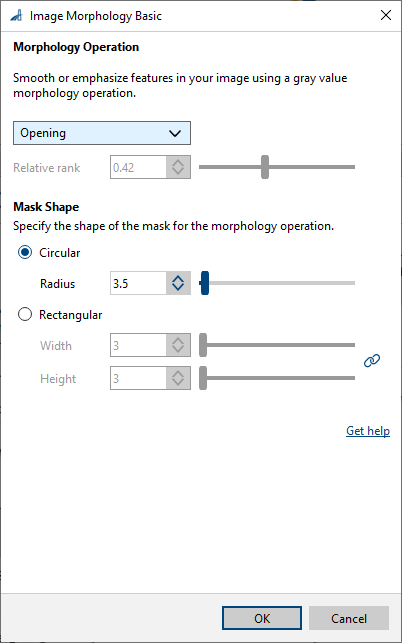
Configuring the vTool#
To configure the Image Morphology Basic vTool:

- In the Recipe Management pane in the vTool Settings area, click Open Settings or double-click the vTool.
The Image Morphology Basic dialog opens. - In the Morphology Operation area, select the desired operation.
- If you have selected Rank in step 2, set the Percent option to the desired rank value.
- Select the desired mask shape: Circular or Rectangular.
- Depending on the mask shape specify the Radius or Width and Height of the filter mask.
You can view the result of the transformation in a pin data view.
Inputs#
Image#
Accepts images directly from a Camera vTool or from a vTool that outputs images, e.g., the Image Format Converter vTool.
- Data type: Image
- Image format: 8-bit to 16-bit mono or color images (see Supported Pixel Formats)
Roi#
Accepts a region of interest from the ROI Creator vTool or any other vTool that outputs regions or rectangles. Multiple rectangles or regions are merged internally to form a single region of interest. The Starter version accepts only RectangleF.
- Data type: RectangleF, RectangleF Array, Region, Region Array
Outputs#
Image#
Returns the filtered image. The output image can be used by any vTool accepting images as input.
- Data type: Image
- Image format: Color or mono images (see Supported Pixel Formats)
Supported Pixel Formats#
Depending on the pixel format of the input image, the Image Morphology vTool outputs the following pixel formats:
| Input Pixel Format | Output Pixel Format |
|---|---|
| Bayer GR 8 | RGB 8 Planar |
| Bayer GR 16 | RGB 16 Planar |
| Bayer RG 8 | RGB 8 Planar |
| BGRA 8 Packed | RGB 8 Planar |
| BGR 8 Packed | RGB 8 Planar |
| Mono 8 | Mono 8 |
| Mono 10 | Mono 10 |
| Mono 12 | Mono 12 |
| Mono 16 | Mono 16 |
| RGB 8 Packed | RGB 8 Planar |
| RGB 16 Packed | RGB 16 Planar |
| RGB 8 Planar | RGB 8 Planar |
| RGB 16 Planar | RGB 16 Planar |