Static Defect Pixel Correction (pylon Viewer)#
This feature is available for ace 2, boost R, and dart M cameras.
How It Works#
The feature provides a graphical user interface (GUI) for the Defect Pixel Correction feature.
It allows you to choose the defect pixel correction mode and to customize defect pixel correction.
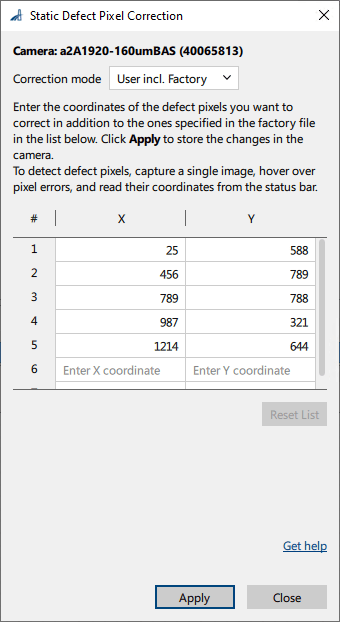
You can customize defect pixel correction by entering the coordinates of defect pixels in a list and storing that list in the camera. The camera will automatically correct these pixels during image acquisition.
Info
In addition to the correction modes available via the pylon API (BslStaticDefectPixelCorrectionMode parameter), the GUI version provides the User incl. Factory correction mode. This mode is only available via the GUI and combines factory and user correction. For more information, see below.
Performing Defect Pixel Correction#
- Stop continuous image acquisition if it is currently enabled.
- Click Camera > Static Defect Pixel Correction.
-
In the Correction Mode drop-down list, select the desired defect pixel correction mode:
- Factory: Only defect pixels whose coordinates are stored in the factory file are corrected. The factory file is generated during camera production and can't be changed.
- User incl. Factory: In addition to factory correction (see above), you can specify custom defect pixel coordinates.
- Off: The camera does not perform static defect pixel corrections.
-
If you selected User incl. Factory:
- Capture a single image using the Single Shot feature.
- Zoom into the image and search for pixel errors.
-
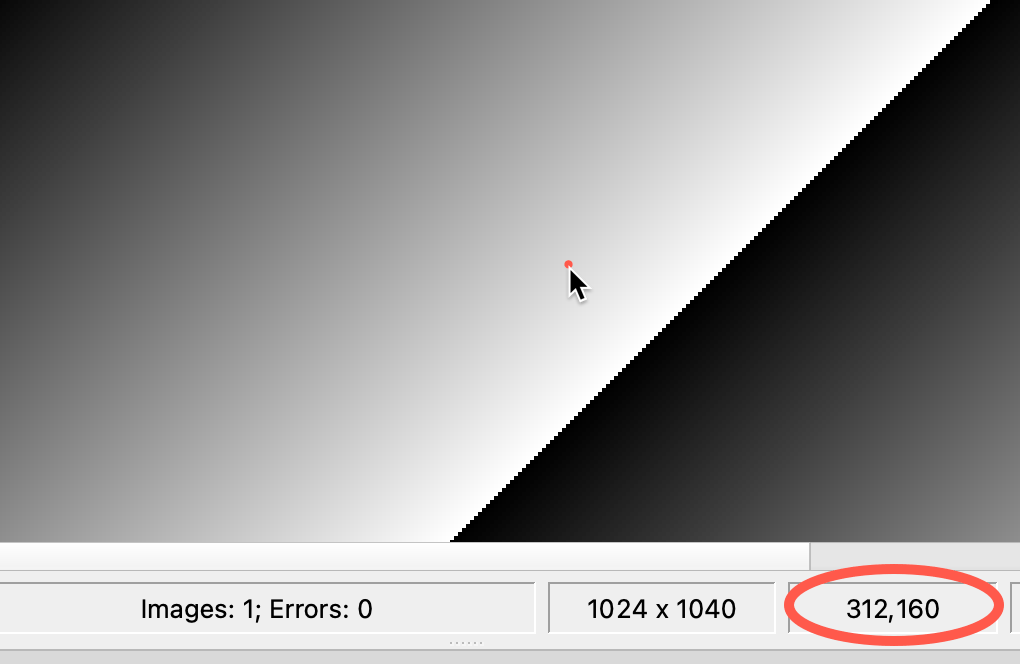
If you found a pixel error, hover over it and read its coordinates from the status bar:

-
Enter the x and y coordinates in the list of the Static Defect Pixel Correction dialog:

Info
If the
OffsetXor theOffsetYparameter or both are set to a value greater than 0, you must add the offset values to the coordinates shown in the pylon Viewer. -
Repeat the above steps for all visible pixel errors.
-
Click Apply to save your settings in the camera's memory.