Assigning an IP Address to a Camera#
These changes will stay in place even when the camera is powered off and back on again.
IP Configuration Options#

There are the following options:
-
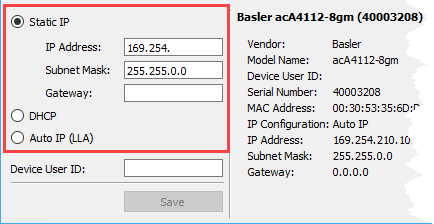
Static IP: Static IP means that you assign an IP address to the camera that will stay in place even when the camera is powered off and back on again. You may also have to specify a subnet mask and a gateway. Make sure that the camera is in the same subnet as the adapter and that the camera has a unique IP address.
Info
pylon for Linux: If you assign a static IP address to the camera that is not in the same subnet as the network adapter, the camera may become unreachable. This is due to security restrictions in newer Linux operating systems. To prevent this, set the rp_filter (reverse path filter) to 2 ("loose mode") on the camera's network interface.
To permanently enable loose mode reverse path filtering, edit /etc/sysctl.conf.
- To do this for all network interfaces, add the following entry to /etc/sysctl.conf:
net.ipv4.conf.all.rp_filter=2 - To do this for a specific network interface, add the following entry to /etc/sysctl.conf:
net.ipv4.conf.[interface].rp_filter=2
Example:net.ipv4.conf.eth0.rp_filter=2
- To do this for all network interfaces, add the following entry to /etc/sysctl.conf:
-
DHCP: DHCP means that a DHCP server assigns an IP address to the camera.
- Auto IP (LLA): Auto IP (Link Local Address) means that the camera uses automatic IP address assignment and assigns itself an IP address.
When you configure a camera to use either a temporary or a static IP address, there are some things to keep in mind:
- For a camera to communicate properly, it must be in the same subnet as the adapter to which it is connected.
- The camera must have an IP address that is unique within the network.
- The recommended range for static IP addresses is from 172.16.0.1 to 172.32.255.254 and from 192.168.0.1 to 192.168.255.254. These address ranges have been reserved for private use according to IP standards.
- If your computer has multiple network adapters, each adapter must be in a different subnet.
For more information about the different IP configuration options, see the Network Configuration topic.
Assigning an IP Address via a DHCP Server#
You can change the method for assigning an IP address to DHCP. This means that a DHCP server assigns the IP address to the camera.
To change the IP configuration of the camera to DHCP address assignment:
- In the top pane of the IP Configurator, select the camera whose IP configuration you want to change.
-
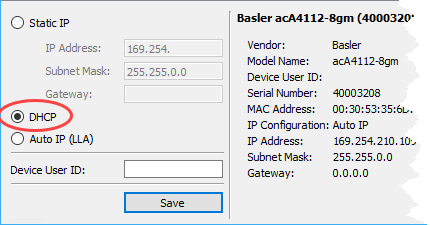
In the lower left pane of the IP Configurator, select DHCP.

-
Click the Save button.
- If you have a newer camera, the IP Configurator will save your changes. This takes a few seconds. When the IP Configurator has finished saving, the information in the top pane and the lower central area will have been updated automatically.
- If you have an older camera and the settings made in step 2 are not compatible with the IP address configuration of the port or network adapter to which the camera is connected, the Assign Temporary IP Address (Force IP) dialog opens. To complete this dialog, go to Assigning a Temporary IP Address to Older Cameras and follow those steps. Once you have completed that procedure, the settings you have made here will be applied.
If no DHCP server is present or if there is a problem preventing the DHCP server from assigning an IP address to the camera, automatic IP address assignment will be used as a fallback.
Assigning an IP Address via Auto IP (LLA)#
You can change the method for assigning an IP address to Auto IP (Link Local Address). This means that the camera uses automatic IP address assignment and assigns itself an IP address.
To change the IP configuration of the camera to Auto IP (LLA):
- In the top pane of the IP Configurator, select the camera whose IP configuration you want to change.
-
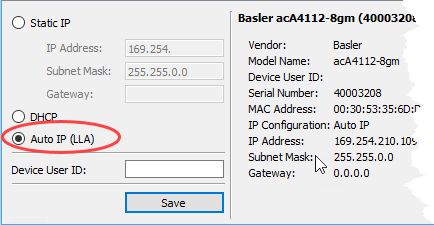
In the lower left pane of the IP Configurator, select Auto IP (LLA).

-
Click the Save button.
- If you have a newer camera, the IP Configurator will save your changes. This takes a few seconds. When the IP Configurator has finished saving, the information in the top pane and the lower central area will have been updated automatically.
- If you have an older camera and the settings made in step 2 are not compatible with the IP address configuration of the port or network adapter to which the camera is connected, the Assign Temporary IP Address (Force IP) dialog opens. To complete this dialog, go to Assigning a Temporary IP Address to Older Cameras and follow those steps. Once you have completed that procedure, the settings you have made here will be applied.