Camera API Generator#
You can select one or multiple connected cameras and generate a static API (C++, C#, or VB.NET) containing only the parameters supported by those cameras.
This allows you to focus on exactly what you need when developing your application.
Generating a Static API#
To generate a static API for your camera:
-
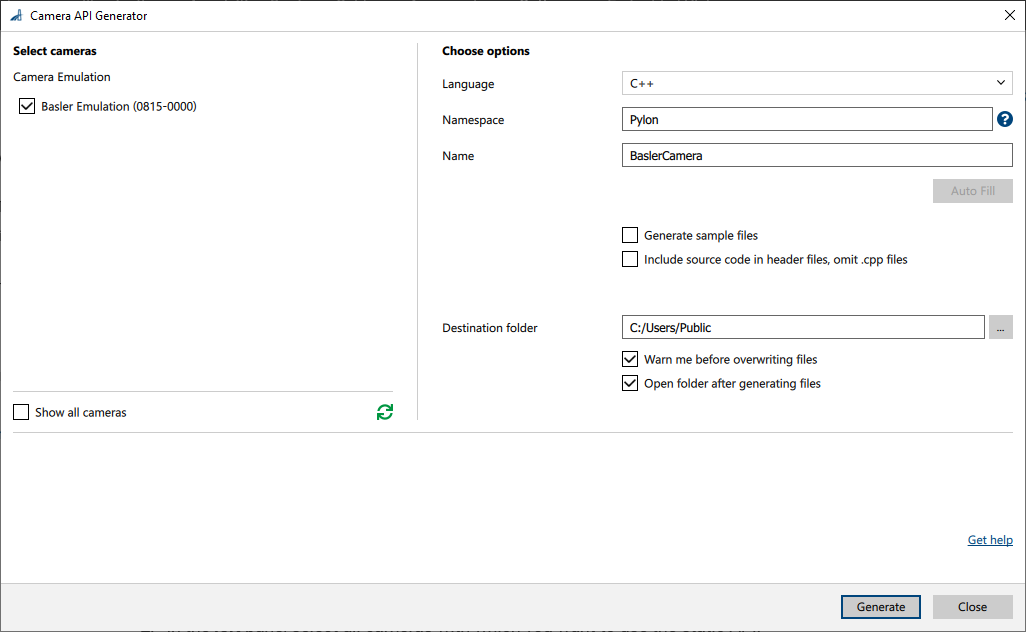
Open the Camera API Generator by right-clicking a camera in the Devices pane or clicking Tools > Camera API Generator.

-
In the left pane, select all cameras with which you want to use the static API.
You can select any connected camera or camera emulation device. If you have selected a camera in the Devices pane, this camera is preselected.
By default, duplicate cameras are hidden. This is because you only need one static API for all cameras of a specific type. To display all cameras, select Show all cameras. -
In the right pane, adjust the settings for the static API:
-
Language: Choose the desired language of the API, either C++, C#, or VB.NET.
If you need multiple languages, you must generate a separate static API for each language. -
Namespace: Enter the desired namespace for the API or click Auto Fill to use the default namespace for the currently selected language.
Use semicolons to create a nested namespace. For example, to define aNamespace::Subnamespacenamespace (C++ notation), enterNamespace;Subnamespace. -
Name: Enter the desired name for the API or click Auto Fill to use the default name.
The name will be used as a prefix for generated files, modules, and classes. -
Generate sample files: Select this option if you want to generate sample files, including a project solution .sln file, alongside the static API files.
-
Include source code in header files, omit .cpp files: Only available if the language is set to C++.
If selected, the C++ source code typically contained in .cpp files is included in the header files (.h files), and only header files are generated. -
Destination Folder: Choose the folder in which you want to save the static API. If the folder doesn't exist, it will be created.
-
-
Click Generate.
The generated files are placed in the destination folder specified.