Overview of the Workbench#
Instead of writing code, simply select the processing steps required from a selection of vTools, connect them in the desired order, and then save them in a so-called recipe file. The Workbench also offers you the opportunity to run and test your recipe before adding it to your application code.
Info
For optimum performance, check that your computer meets the system requirements.
Main Window#

Workbench Menu#
The Workbench menu offers the following commands:
- New Recipe: Creates a blank recipe.
- New from Template: Creates a new recipe based on a template.
- Open Recipe: Opens an existing recipe.
- Save: Saves the current recipe.
- Save As: Saves the current recipe under a different name.
- vTool Use Cases: Opens a folder where you can select recipes for specific use cases. The recipes are ready to run and don't require a camera. They contain suitable sample images and a short description of the application scenario. The use cases are meant to demonstrate how to solve your own vision tasks.
- Recipe Code Generator: Allows you to generate sample code to use your vTool recipe in your development environment.
- vTool Licensing: Opens the vTool Licensing page of the Welcome dialog.
Toolbar Buttons#
| Icon | Function |
|---|---|
| Creates a new recipe. | |
| Opens an existing recipe. | |
| Saves the current recipe. | |
| Opens the Recipe Code Generator. | |
| Locks resources. This means that resources are allocated exclusively to a vTool. This is necessary for some vTools, e.g., the Camera vTool, in order to access, configure, and save settings. | |
| Unlocks resources. This frees up resources that have been allocated exclusively to a vTool. | |
| Runs the recipe. | |
| Stops the recipe. | |
| Captures a single image. | |
| Captures images continuously. | |
| Opens a pin data view to see the results of your recipe. |
Panes#
To open and close the Workbench and its panes, select/deselect the desired options in the Window menu. In addition to that, you can open and close the Workbench pane using the Workbench button in the pylon Viewer's toolbar:
Workbench Pane#
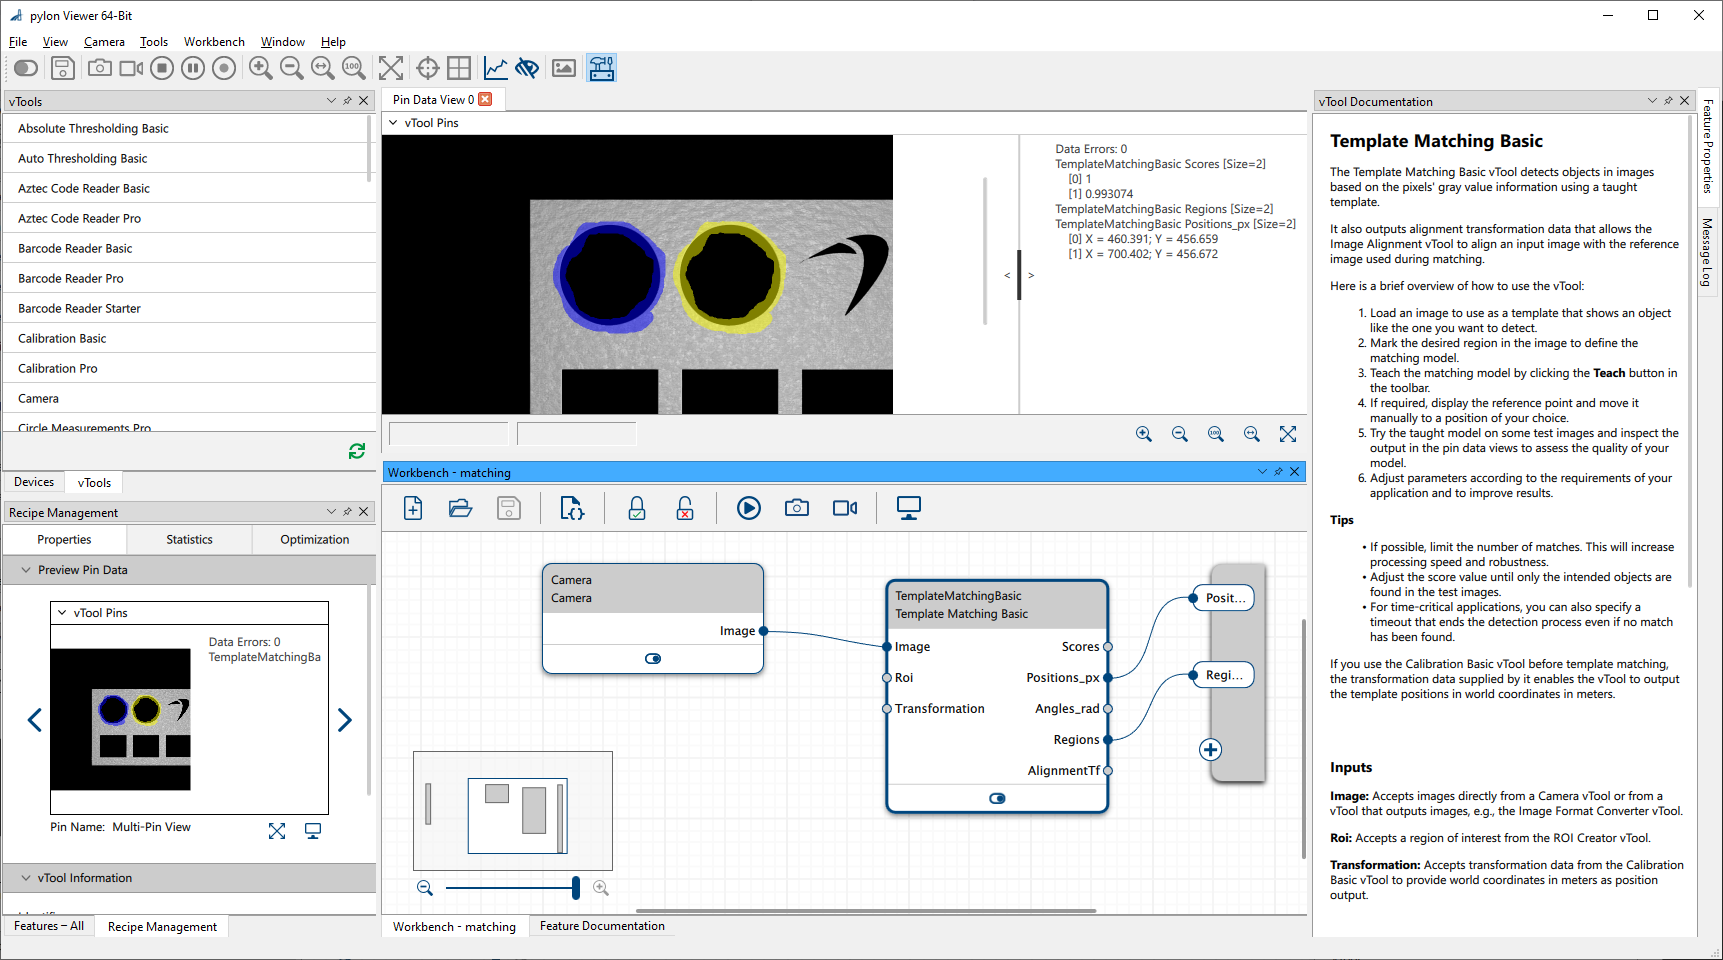
The Workbench pane is the place where you create image processing designs, the so-called recipes. You can also test the recipes here by running them and view the results in a pin data view. For information about how to create and test recipes, read the Working with Recipes topic.
The Workbench also contains a little feature called the mini map. If your recipe contains a lot of vTools, not all may be visible depending on the size of the pane. In such situations, you can check the mini map which shows you any vTools outside of the visible area.
vTools Pane#
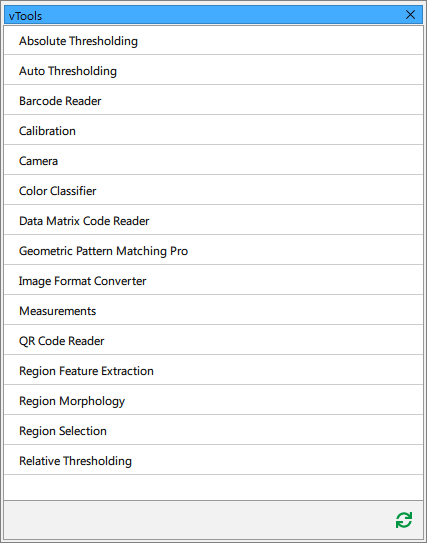
The vTools pane in the pylon Viewer shows all vTools included in the current pylon version. The vTools for which you don't have a license appear dimmed. The pane also offers you a search bar to look for a specific vTool and allows you to define your favorite vTools.
The vTools are grouped according to use cases. The Supporters group contains vTools that can be used for a number of different use cases.
You can add a vTool to your recipe by pointing to it with your mouse and clicking the + icon next to it. Alternatively, right-click in a recipe and select the desired vTool that way.

vTool Documentation Pane#
The vTool Documentation pane displays information about the vTool currently selected in the Workbench pane. It gives you a brief overview of what the vTool does as well as its input and output pins.
Recipe Management Pane#
The Recipe Management pane allows you to view vTool information, monitor recipe execution, and make adjustments to recipes to improve the performance.
It contains the following tabs and areas:
- Properties tab
- Preview Pin Data area
Displays a preview of the input and output data of the vTool currently selected in the Workbench when running a recipe. - vTool Information area
Displays information about the vTool currently selected in the Workbench, e.g., its identifier and type. - vTool Settings area
Allows you to open the settings dialog of the vTool currently selected in the Workbench where you can configure the vTool.
- Preview Pin Data area
- Statistics tab
Allows you to collect statistical data about your recipe and the vTools included in the recipe. - Optimization tab
Allows you to optimize thread handling.
For more information, see Recipe Management.
Pin Data View#
Pin data views show the results of your recipes while you are running them. You can open up to 16 views at the same time and select which pin data to display in each view.
Pin data views are also useful when configuring the vTools. When you're testing your settings on sample images, check the data in the pin data view to verify that the results are as expected.
If there are several results from the same pin, links are provided that allow you to show the region related to that result in the image.
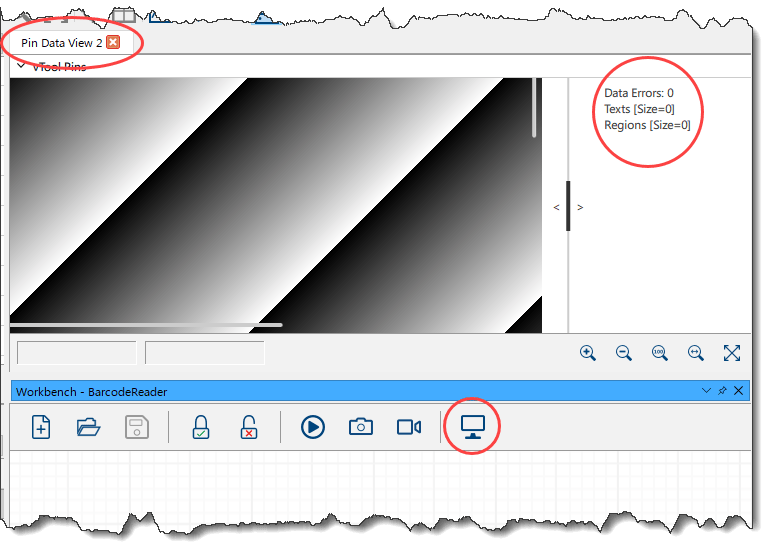
The following screenshot shows a pin data view with the results section highlighted.

To display recipe results in a pin data view:
- Open a pin data view by clicking the Pin Data View button in the Workbench toolbar:
A pin data view opens above the Workbench. - In the pin data view, expand the vTool Pins drop-down list.
- In the list, select the pins whose data you want to display.
- Click vTool Pins again to collapse the list.
- Start the recipe by clicking the Run button in the Workbench toolbar:
The results are displayed in the pin data view.
More Information#
- What are vTools?
- Working with Recipes
- Recipe Management